Using your takepaymentsplus device
We want to make setting up your new device as easy as possible, watch these videos below to help you in any questions you may have!

Check out our full guide for detailed instructions
Want to dive straight in? Set up card payments and the takepaymentsplus features yourself by following our YouTube videos below.
Getting started
We take you through how to get your email activation and set up your pin on your takepaymentsplus device
Taking card and cash payments
We go through how to take card and cash payments straight away on your takepaymentsplus device
Managing products
Want to know how to turn on products mode on your takepaymentsplus device? Watch the video below.
Managing cashiers
We take you through how to locate, edit and add your cashiers on your takepaymentsplus device
Adding gratuity
We walk you through how to enable gratuity on your takepaymentsplus device.
Issuing refunds
Want to know how to refund a payment on your takepaymentsplus device? Watch the video below to find out.
Understanding transaction tab
We go through how to access, filter and find specific transactions on the takepaymentsplus device.
Using the till under products mode
See below to see how we take you through how to use the till under the products mode.
Understanding the reports tab
Want to learn how to use the reports tab on your takepaymentsplus device? Watch the video below to find out.
Receipt copies
Want to learn how to get receipts on your takepaymentsplus device? See below.
How to connect to WiFi
We go through how to connect to WiFi on our takepaymentsplus terminal
Logging into your Web Portal
To log into your Web Portal please follow the steps below:
Step 1: Follow this link to our Web Portal: https://web-portal.takepaymentsplus.com/login
Step 2: Click on the email link option as shown below and enter your Merchant ID and your email address. Then click on ‘Email access link’.
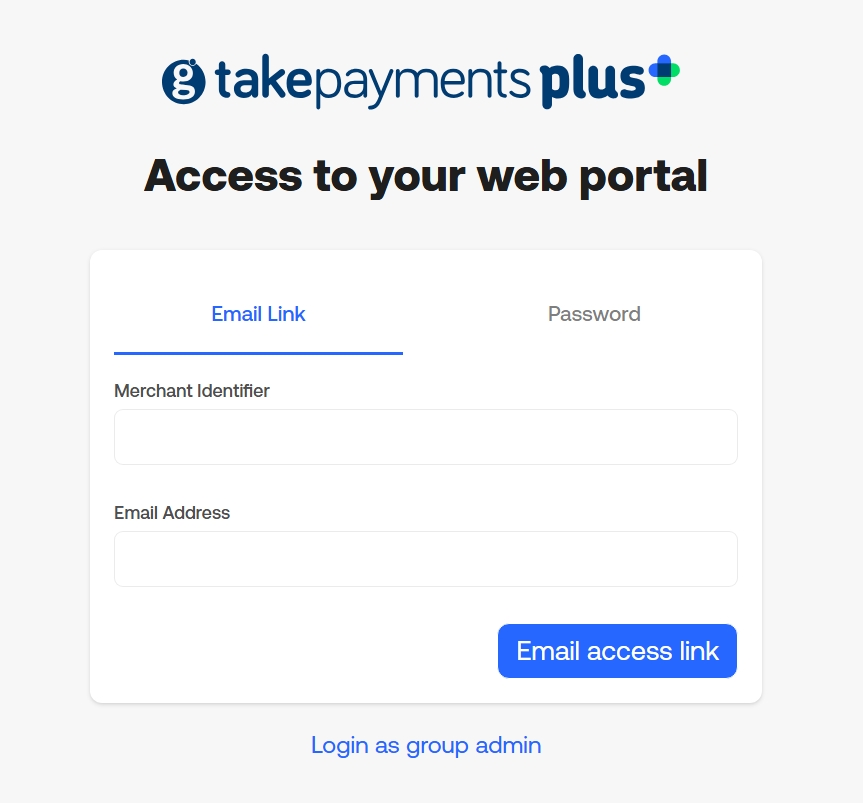

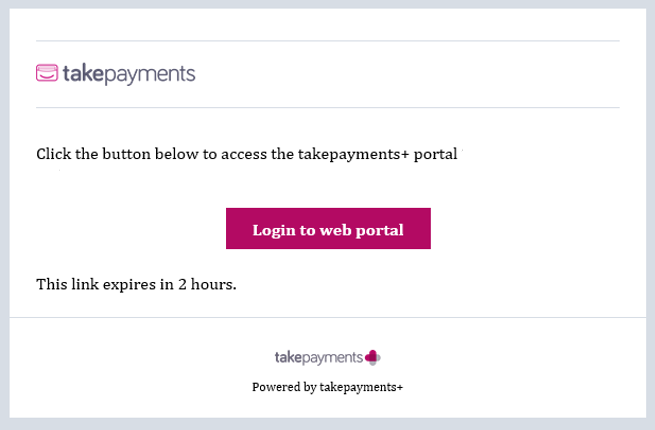
Step 3: Once you've entered your details as above, go to your email inbox and find the email from noreply@takepaymentsplus.com we’ve sent to you. In the email, click on ‘Login to web portal' and it’ll automatically log you in.

Not already using our Web Portal?
The takepaymentsplus Web Portal helps you keep track of your business with detailed reporting from your terminal. You can also manage your products, pricing and more from there.
To get started, you can follow the steps above.
Access Point Name (APN) set up
Getting connected
The SIM requires the APN information in order to establish a connection with the cellular network and in turn provide the internet connectivity.
The SIM setup process is made up of two main stages - the first the configuration of the Access Point Name(s) (APN) used by the SIM and the second optional step is to manually choose the cellular network the SIM should initially connect to.
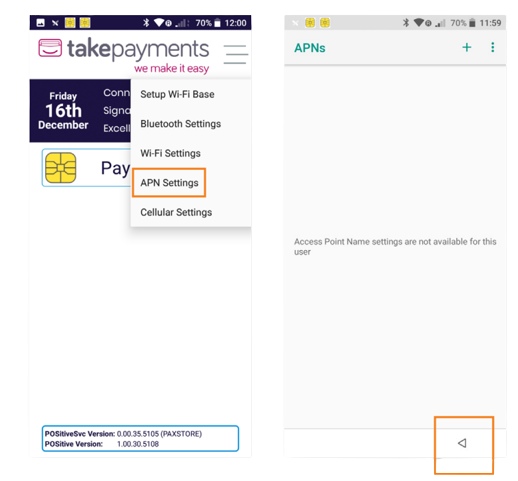
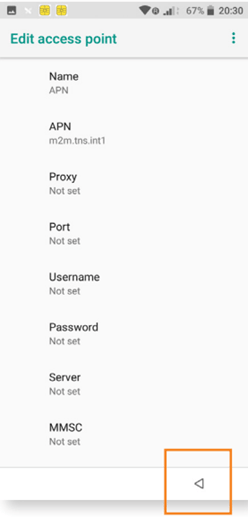
1. Select the menu icon on the main A920 Pro Launcher screen and choose APN Settings. Next, tap the + symbol to add an APN setting.

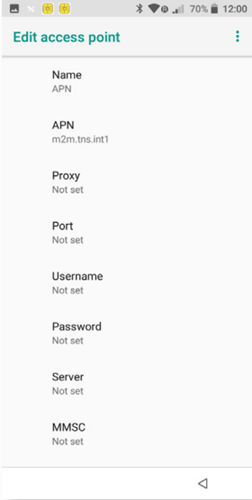
2. Enter the below details to configure the APN.
1. Name: APN
2. APN:m2m.tns.prod1 (All other options can be left blank or as the default value)
3. Once all details have been added, click the Back Button to return to the APN settings screen.
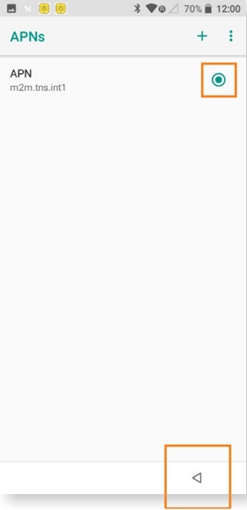
4. Make sure that the APN you have added has been selected and then press the back error to exit the APN settings.
Trending articles
Can't find what you need?
Our dedicated Customer Support Team are on hand 7 days a week to answer any questions you have. You can call, email or connect via Live Chat.