Using PAX A920 card machine
Welcome to your A920 card machine. Here you'll find everything you need to know about getting set up with your terminal, and the answers to some of the most commonly asked questions.
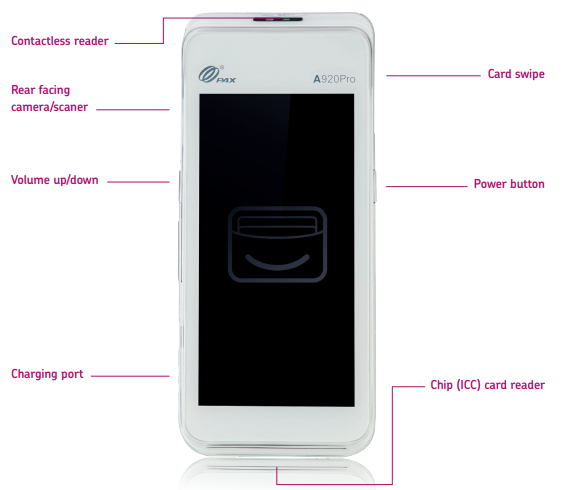
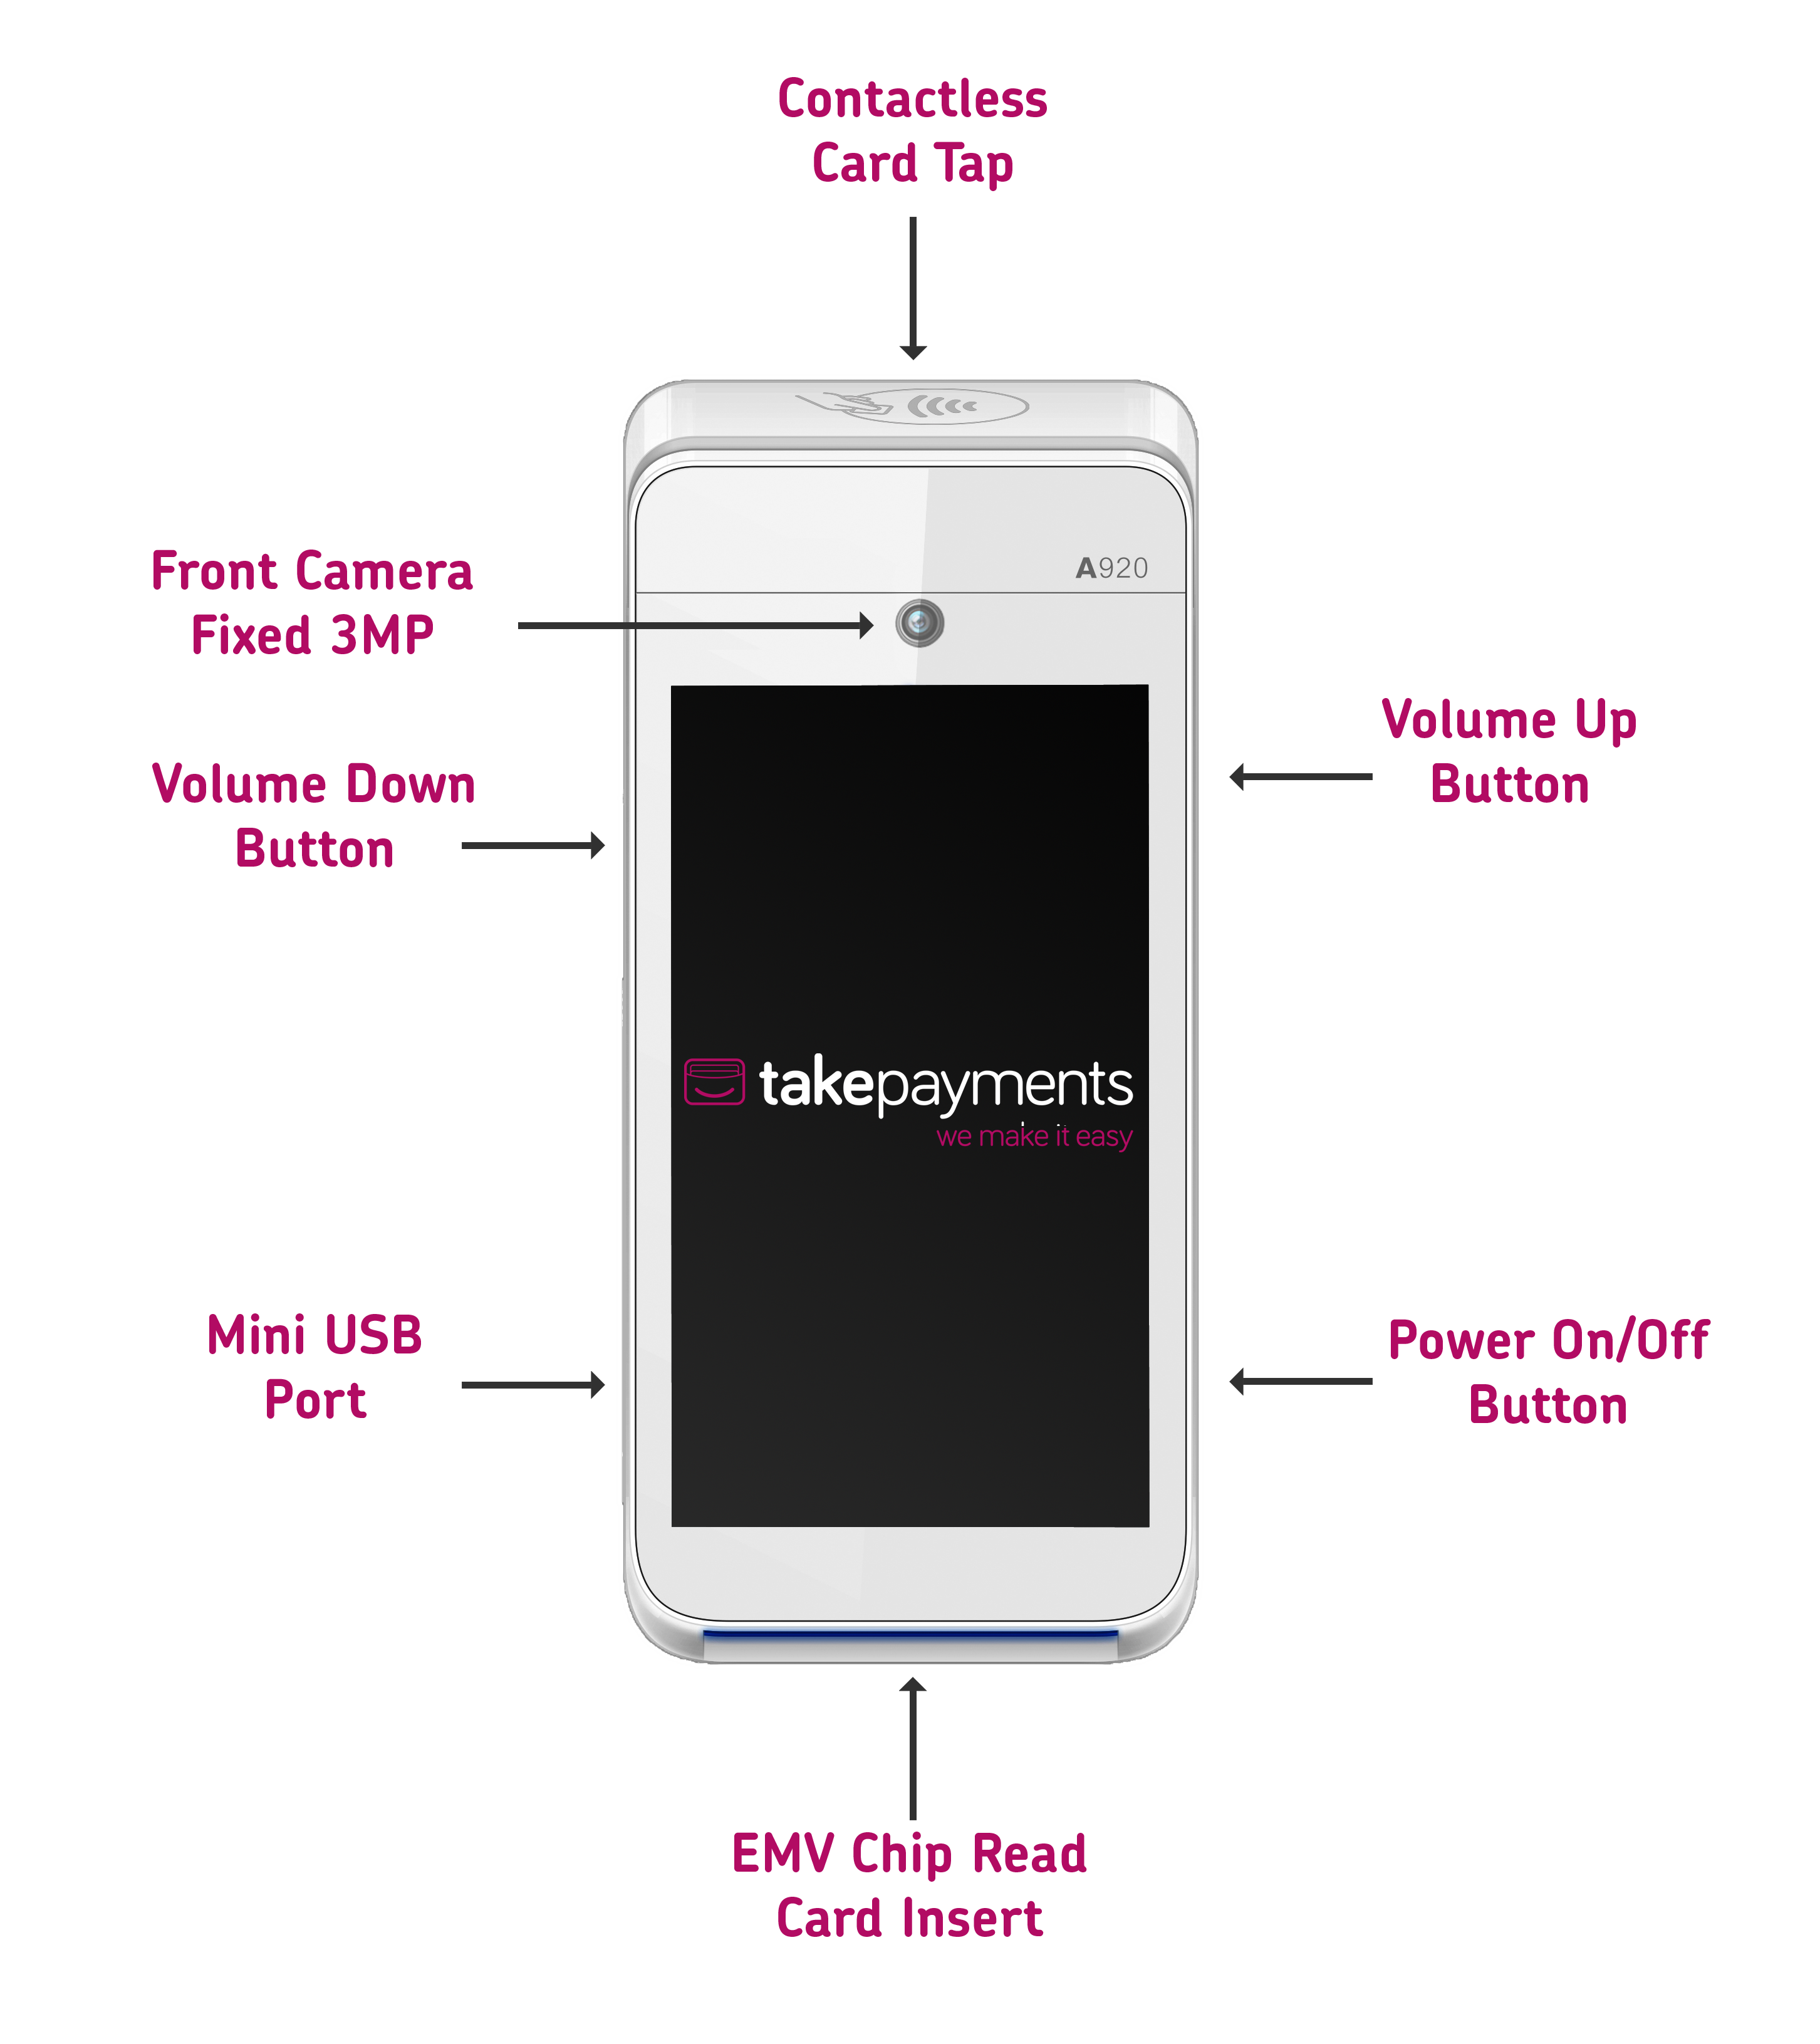
Your PAX A920 brings style and practicality together, and is perfect for most independent businesses.
It features a 5" touch screen and allows you to track transactions by each member of staff.
WiFi and Bluetooth connection methods are provided as standard, and 4G can be added as an optional extra.

Getting started
Our A920 user guide is designed to provide users of the A920 with everything needed to set up, register, and process transactions.
Power and charging
Power On/Off
You can turn on the A920 by pressing and holding the small rectangle button on the right side of the terminal for 2-4 seconds and then release.
To turn off the device, hold down the same button until you are presented with the four options:
- Airplane mode
- Vibration
- Reboot
- Power off
Select ‘Power Off’, then select again. The device will then shut down.
Charging Instructions
Before starting up the A920, the battery should be fully charged.
Charge the device by plugging the USB end of the cable into a PC or power supply and then plug the Mini USB end into the port on the left side of the terminal. Charge the battery until full.
Logging in and main menu
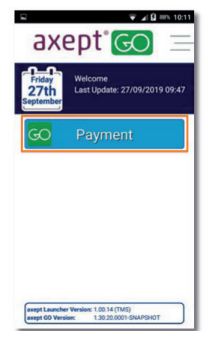
Logging in
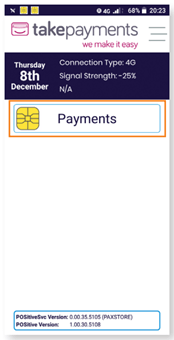
Press the Payments button to load the application
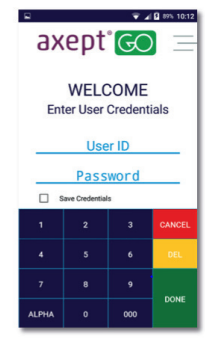
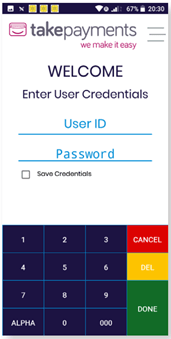
The login screen will be displayed. Enter the User ID and Password supplied via email. Select Save Credentials if you want to store the login details to be used automatically in the future.
After a moment, the main A920 Pro screen will be displayed.
If the details entered during the login are incorrect, the A920 Pro will confirm using the screen shown here before returning to the login screen to retry.
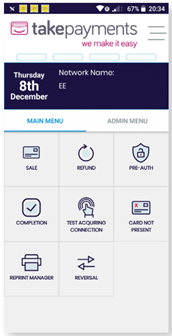

Main menu
Once you're logged in, you'll be taken to the menu screen. This is split into 'Main Menu' and 'Admin Menu'. On the Main Menu screen, you will find a small data display that will give you some quick information about your device.
This includes:
- Your connection type
- Your signal strength
- Your number of stored transactions
- Your user ID
- Your last Z Report date and time
- Network Name

Getting connected
Access Point Name (APN) set up. The SIM requires the APN information in order to establish a connection with the cellular network and in turn provide internet connectivity.
If you have opted for a 4G ready A920 device, it should be preconfigured ready out of the box. If you need to configure your terminal for cellular connection, please follow these steps.
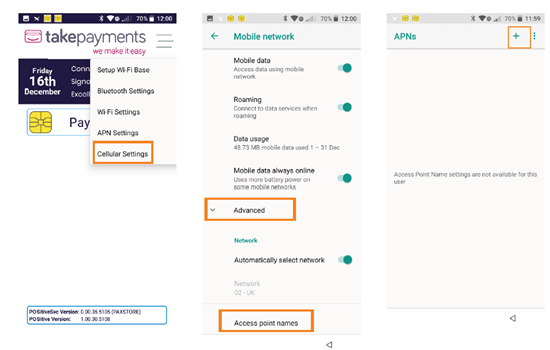
1. Select the menu icon on the main A920 Pro Launcher screen and choose Cellular Settings. Next, Choose advanced, then Access Point Names. When on the screen shown on the left tap the + symbol to add an APN settings.
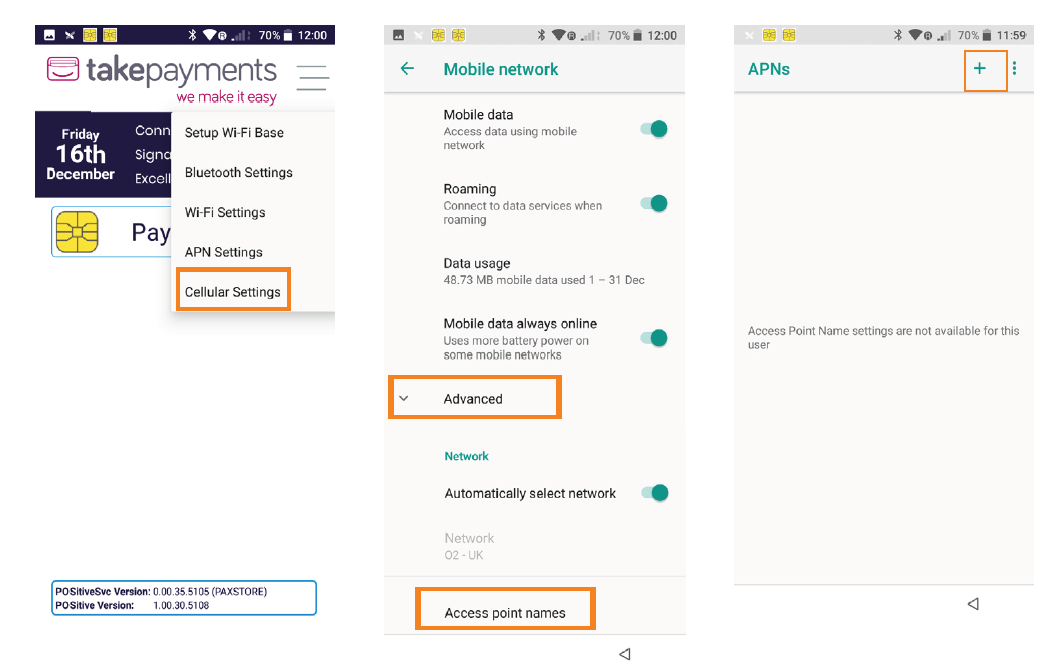
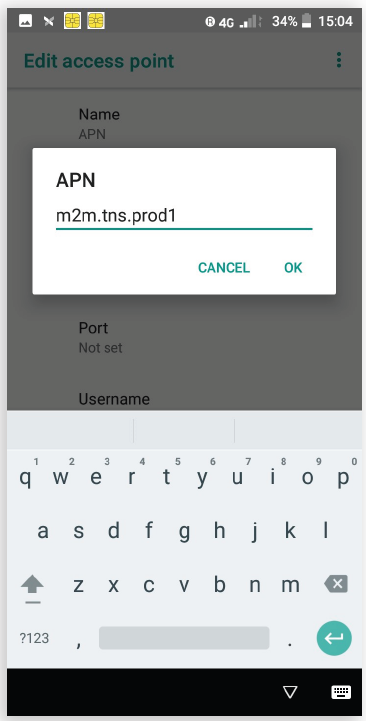
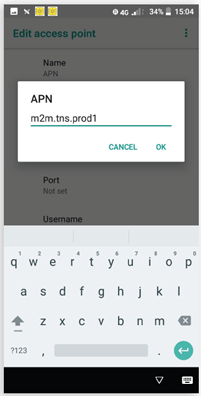
2. Enter the below details to configure the APN.
- Name: APN
- APN: m2m.tns.prod1 (All other options can be left blank or as the default value)
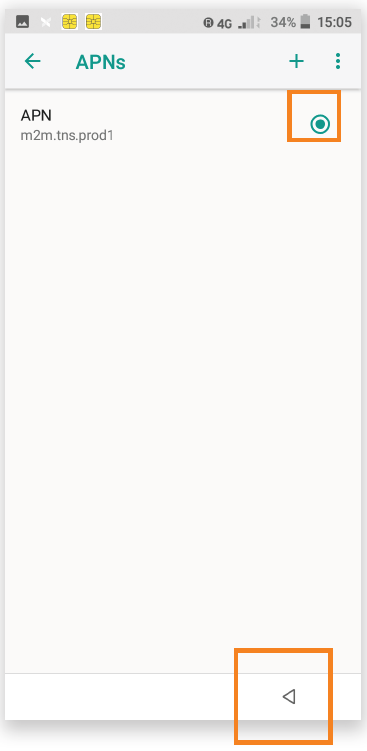
3. Once all details have been added, click the Back Button to return to the APN settings screen.
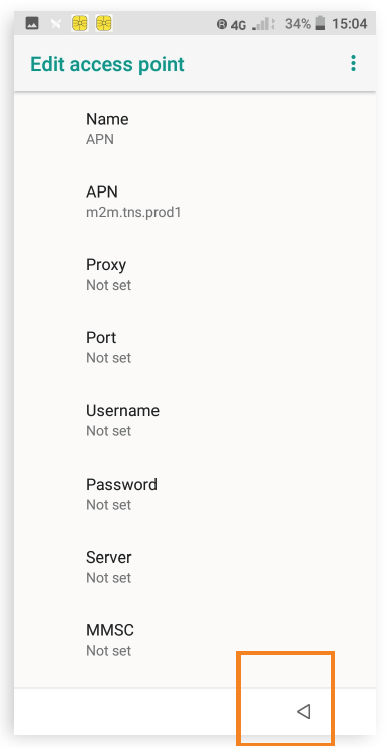

4. Make sure that the APN you have added has been selected and then press the back error to exit the APN settings.
How to take a payment on the A920
Want to know how to take a payment on your A920 device? See below to find out.
How to turn on the A920
We walk you through how to turn on your A920 device.
How to log in to the A920
Logging into your A920 is necessary. We went through how to log in correctly.
How to turn off the A920
Want to know how to turn your A920 device off? Have a watch to find out.
How to replace or add till roll on the A920
We walk you through how to replace or add a till roll.
How to connect to WiFi on the A920
Want to know how to connect your A920 device to WiFi? Watch to find out.
Trending articles
Can't find what you need?
Our dedicated Customer Support Team are on hand 7 days a week to answer any questions you have. You can call, email or connect via Live Chat.