How to set up a Facebook Business page
How to set up a Facebook Business page
05 November 2020 | Published by Jodie Wilkinson
A Facebook business page is a simple way to make it easier for people to find out more about your business and share up to date information with your followers.
You’ll need a personal Facebook account to be able to create a business page, it won’t be visible to your friends, unless you share it with them (which you’ll probably want to do!)
Once you’re logged into your personal Facebook account, just follow these steps:
Step 1: Sign up
In the top navigation bar, click on Create and choose Page from the dropdown list:
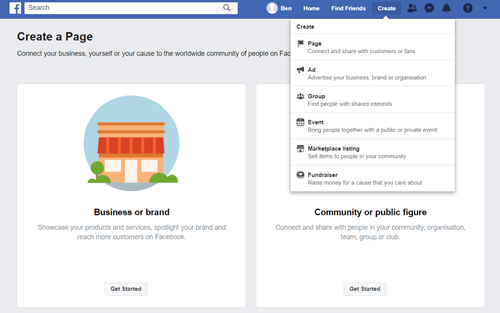
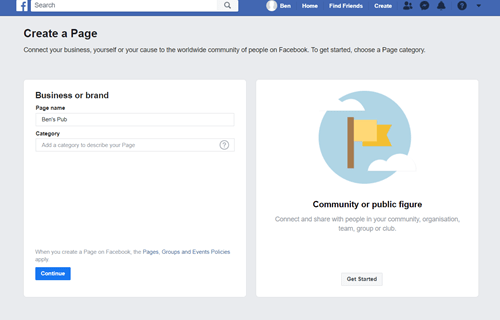
This will take you to the below page. Click on Get started on the Business or Brand option on the left-hand side:

Now you’ll see the below page where you can add your business information.
For the name of the page, use your business name.
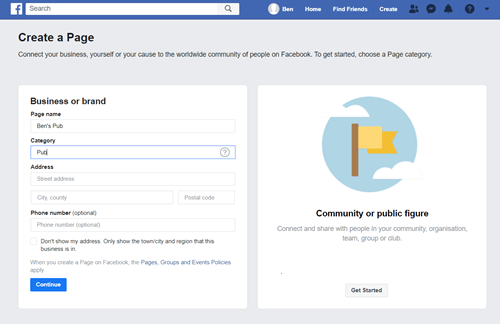
For category, you can enter a word or two that describe your business, for example, ‘Pub’ and then choose the category that matches your services the best.
You’ll then be asked for your address and phone number. You can choose whether to make this public or not. Then click ‘Continue’ – this means that you’re accepting Facebook’s Pages, Groups and Events Policies, so have a read of those before agreeing.
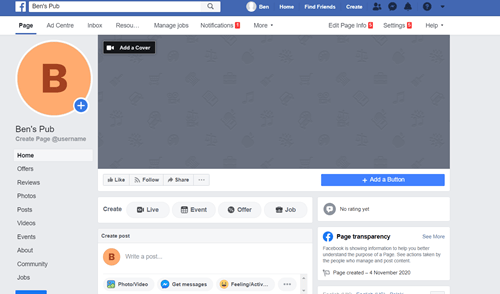
Step 2: Add some pictures to showcase your business
Next up, you’ll be asked to add a profile picture and a cover photo.
Profile picture
If you have a business logo, this is the best image to use for your profile picture. If not, make sure your image shows really clearly what your business is or does.
Your Facebook profile picture displays at 170 x 170 pixels on desktop and 128 x 128 pixels on mobile. It will also be cropped into a circle shape, so make sure it doesn’t cut off anything important.
Once you’ve added your profile picture, click ‘Upload profile picture’.

Cover photo
For your cover photo, choose something that showcases your business, maybe a picture of the outside, a bigger logo, or of some of your products or services.
It will display at 820 x 312 pixels on desktop or 640 x 360 pixels on mobile and your image must be at least 400 pixels wide and 150 pixels tall. Facebook recommends the best size to upload is 720 x 315 pixels.
Once you’ve added your profile picture, click ‘Upload a cover photo’.
And that’s the skeleton of your business page created!
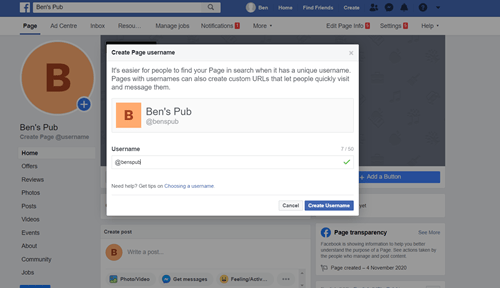
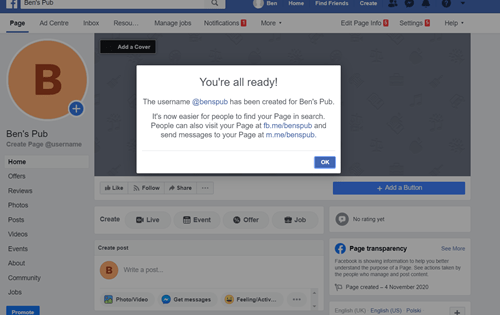
Step 3: Create your username
Just under your business name, click on ‘Create Page @username’. Your username can be up to 50 characters long, but make sure it’s easy for people to type and for them to remember so they can find you quickly. Your business name or something similar and recognisable is best.
You’ll get a pop up, where you can enter your username, then click ‘Create username’.
You’ll then get a pop up telling you that your username has been created and the links people can use to easily find and connect with your business on Facebook and Messenger.
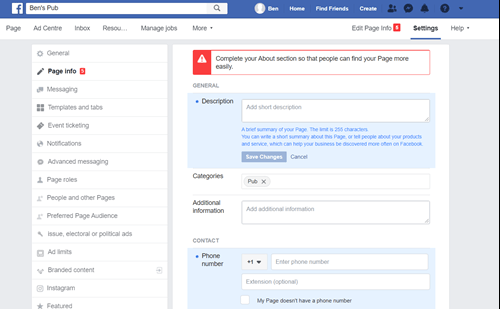
Step 4: Add in your business details
Click on ‘Edit page info’ in the top menu and you’ll see that you can edit the information about your business.
Description
You can add in a short description about your business, just a couple of sentence will do – there’s a 255 character limit. It should, in a nutshell, tell people what your business does and why you’re different.
For example: “Ben’s Pub is a place for locals to meet and enjoy the best beers around! During lockdown, we’ll be offering a click and collect service, order here: XXXXXX”
Categories
You can add additional categories to the one you added when you set the page up (which you’ll see in this section already). This helps Facebook show your page to the right kind of people.
Contact
Add all the contact details you want the visitors to your page to see, including a contact number, website if you have one and email address they can contact you on.
Location
If you have a premises, you can check it’s appearing in the correct place on the map, which is really important if you’re offering a click and collect service. If you deliver, you can set a service area, so people can see where you deliver to.
Impressum
This is optional and is only required in certain European Countries (not the UK).
Click ‘Save changes’ under each section.
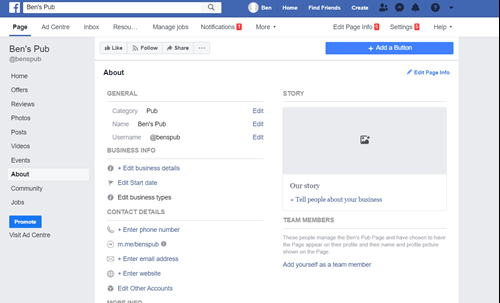
Step 5: Tell your story
You’ve added all the basics, now is the time to sell your business and Facebook has a ‘your story’ section where you can do this.
On the left-hand menu, select ‘See more’ and then ‘About’, and then click ‘Our story’ on the right-hand side.
Add in a detailed description about what your business offers, what makes you different and why people should use your services.
This is the place to really shout about what you can offer people, any services you offer and what makes you different.
You can enter a headline and then text, and a photo – make sure it’s relevant. Then click ‘Publish’.
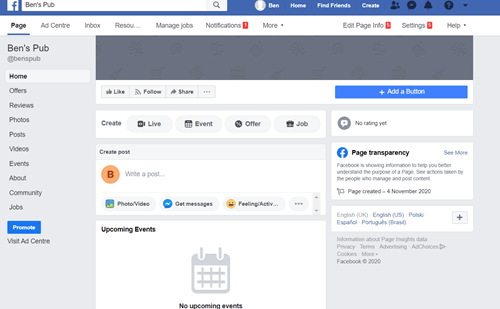
Step 6: You’re ready to post!
Before you start inviting people to like your page, it’s a good idea to put up a post welcoming people to your page, with some interesting content, an offer, whatever you think will engage your customers.
If you’re offering click and collect, this is the perfect place to add the social images from takepayments’ marketing pack to really shout about your offer.
Remember to include the image, the days and times you’re offering and info on how your customers can order through Order and Beepaid.
Step 7: Get sharing!
That’s it, your page is complete! Now you need to get sharing to get some followers!
You can invite your existing friends and ask them to like your page. Share it on other social channels, if you’re on them, add it to your website, or any marketing you do.
Read our blog on how to get more followers here.